Installing BackupPC on CentOS
The definitive guide to installing...
or close enough
Part 3 of 3
This is part 3 of a 3-part article. If you haven't seen the other parts, you can find them here: Part 1 and Part 2.
Part 3 goes through configuring Linux and Apple Hosts. For Windows PC Hosts, see BackupPC and Volume Shadow Services
There are three sections below
- BackupPC Server SSH Configuration
- BackupPC Server and Linux Workstations
- Apple MacOSX
I use SSH and rsync for Linux and Apple Host because the software is standard on the OS's, it's secure, and it's easy to configure.
BackupPC Server SSH Configuration
To get started, we need to create the SSH Keys for the backuppc user
List the folder
# ls /var/lib/BackupPC/.sshIf it doesn't exist, run the following command as root
# sudo -u backuppc ssh-keygen -t rsa -C "backuppc"Press 'Enter' after each line to create keys with no password
Enter file in which to save the key (/var/lib/BackupPC/.ssh/id_rsa): <<Enter>>
Enter passphrase (empty for no passphrase):  <<Enter>>
Enter same passphrase again:  <<Enter>>
Public key is saved in: /var/lib/BackupPC/.ssh/id_rsa.pub
This creates the Public and Private key for the backuppc user
BackupPC Server and Linux Workstations
For BackupPC to backup the Linux Server or another Linux Workstation, the backuppc user must login remotely without a password. We can accomplish this by copying the backuppc user's public key to the root user
First, we need to verify that the local root account has SSH configured
# ls /root/.sshIf this folder doesn't exist, run the following command from root to create the folder and keys
# ssh-keygen -t rsa -C "root"
Additionally, open the SSH config file
# vi /etc/ssh/ssh_configVerify the following two lines are commented with '#'
# StrictHostKeyChecking no
# PasswordAuthentication no
If the SSH config file is changed, restart the service
# systemctl restart sshdNow, copy the backuppc users public key to the local root account
- For the BackupPC Server, use localhost or the Server host name
# sudo -u backuppc ssh-copy-id root@localhost - Enter root password
- For the Linux Workstation, use the computer name (ex. MyLinuxLaptop)
# sudo -u backuppc ssh-copy-id root@MyLinuxLaptop- Enter root password
After the command above, successfully, completes, the following command should connect without password
For the BackupPC Server use localhost or the Server host name
# sudo -u backuppc /usr/bin/ssh root@localhostFor the Linux Workstation, use the computer name (ex. MyLinuxLaptop)
# sudo -u backuppc /usr/bin/ssh root@MyLinuxLaptopIf the following error is seen in the logs when performing a backup: Unable to read 4 bytes?
Run the ssh-copy-id command again and verify the backuppc user can login with no password
Once you can connect without a password, go to BackupPC Configuration Page (ex. http://localhost/BackupPC)
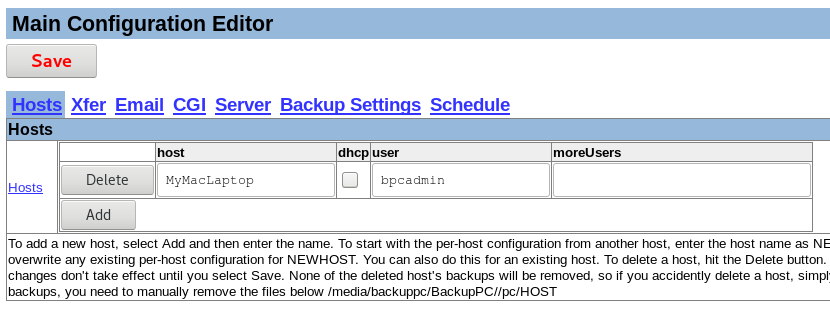
Click 'Edit Host' and 'Add'
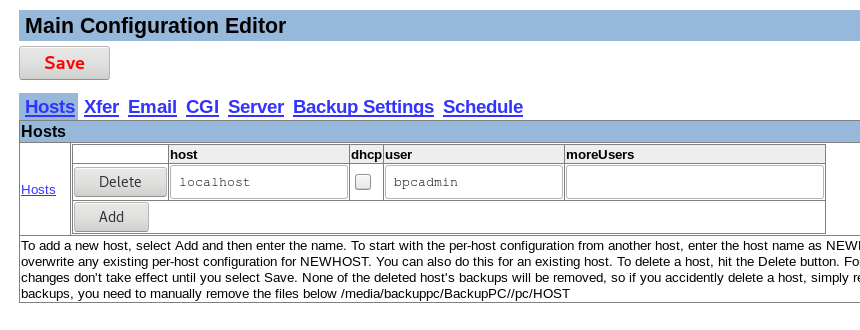
Enter Host:
For the BackupPC Server, use localhost or the Server host name
For the Linux Workstation, use the computer name (ex. MyLinuxLaptop)
Enter User:
This user can be the Admin or a regular user. If this is a regular user and you want this user to access his/her own backups, then add a password using htpasswd as shown in Part 1
Click 'Save' and then click another link (ex. Host Summary) or refresh the page. Once the page is refreshed, you will see the host name listed in the Host Drop Down list.
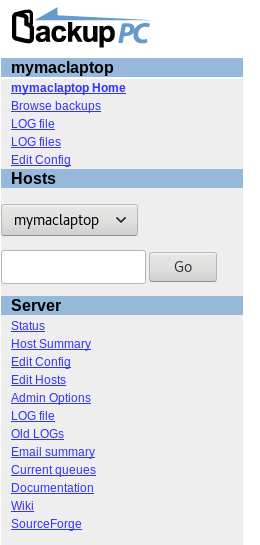
Select the Linux Hostname (localhost or MyLinxLaptop) and click 'Edit Config' in the Host Name Section, not the Server Section
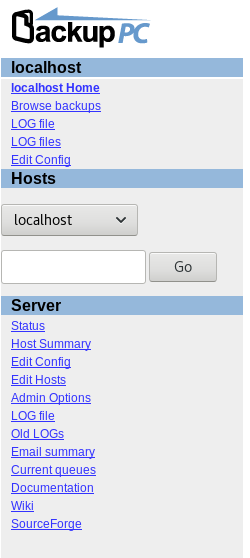
Click 'Xfer'

Change the XferMethod to rsync
Change the RsyncShareName to reflect folders to backup
- Example: /etc and /home
This is all I do to connect Linux computers, but configure other settings as needed, i.e., Email, Backup Settings, and Schedule
Apple MacOSX
Backing up Apple computers is much the same thing, just have to go about it a different way.
First, we need to allow remote connections
Open System Preferences -> Sharing
Check 'Remote Login'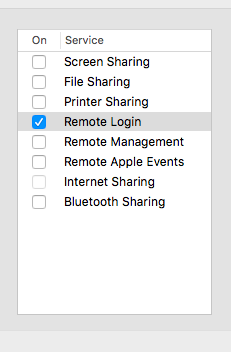
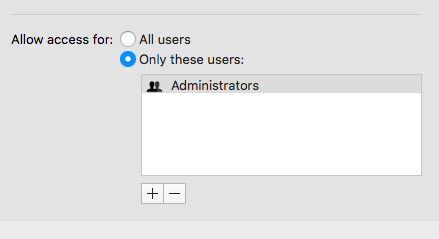
Check 'Only these users:' and select 'Administrators'
If only one user account is needed to be backed up, skip Enable Root User section
Enable Root User
If needing to backup multiple user accounts or folders outside a user folder, you will need to enable the Root User.
Choose Apple menu > System Preferences, then click Users & Groups (or Accounts).
Click lock icon, then enter an administrator name and password.

Click Login Options.
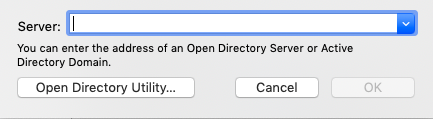
Click Join (or Edit).
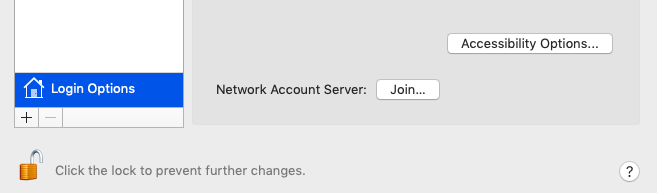
Click Open Directory Utility.
Click lock icon in the Directory Utility window, then enter an administrator name and password.
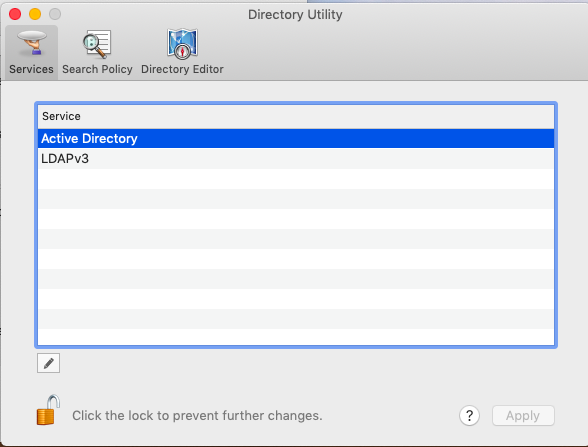
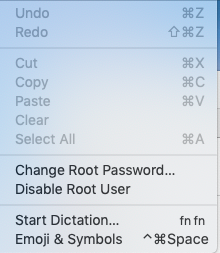
From the menu bar in Directory Utility:
Choose Edit > Enable Root User, then enter the password that you want to use for the root user.
Or choose Edit > Disable Root User.
Reference: https://support.apple.com/en-us/HT204012
Copy backuppc public key to user account
- If root user is enabled:
# sudo -u backuppc ssh-copy-id root@MyMacLaptop - If root user is not enabled (change AppleUser to reflect the user account needing to be backed up):
# sudo -u backuppc ssh-copy-id AppleUser@MyMacLaptop
Verify that you can login from the BackupPC server without a password:
- If root user is enabled:
# sudo -u backuppc ssh root@MyMacLaptop - If root user is not enabled (change AppleUser to reflect the user account needing to be backed up):
# sudo -u backuppc ssh AppleUser@MyMacLaptop
The backuppc Server should be able to ssh into the remote computer without a password
If the following error is seen in the logs when performing a backup: Unable to read 4 bytes?
Run the ssh-copy-id command again and verify the backuppc user can login with no password
Once you can connect to the remote computer without a password, go to BackupPC Configuration Page (ex. http://localhost/BackupPC)
Click 'Edit Host' and 'Add'
Enter Host:
For the Apple Computer, use the computer name (ex. MyMacLaptop)
Enter User:
This user can be the Admin or a regular user. If this is a regular user and you want this user to access his/her own backups, then add a password using htpasswd as shown in Part 1
Click 'Save' and then click another link (ex. Host Summary) or refresh the page. Once the page is refreshed, you will see the host name listed in the Host Drop Down list.
Select the Apple Computer Hostname (MyMacLaptop) and click 'Edit Config' in the Host Name Section, not the Server Section
Click 'Xfer'
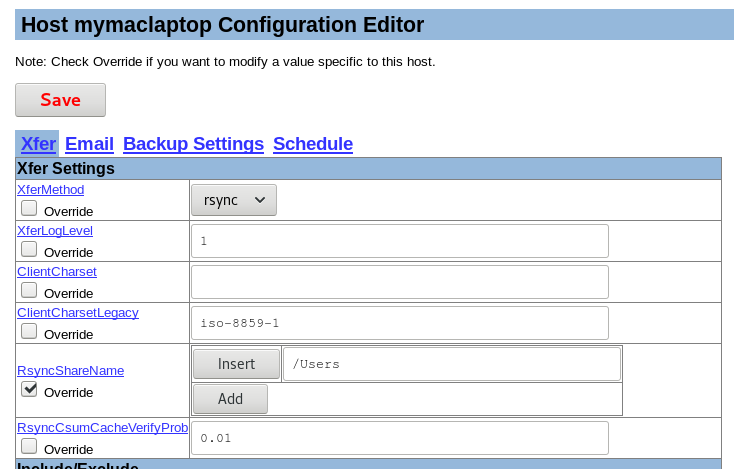
Change the XferMethod to rsync
Change the RsyncShareName to reflect folders to backup
- If root user is enabled, backup multiple user accounts:
- RsyncShareName = /Users
- If root user is not enabled, backup one user account:
- RsyncShareName = /Users/AppleUserAccount
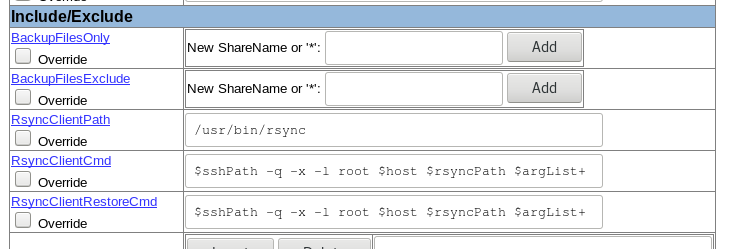
For RsyncClientCmd and RsyncClientRestoreCmd, change the user, if root is not enable
- If root user is enabled:
- $sshPath -q -x -l root $host $rsyncPath $argList+
- If root user is not enabled:
- $sshPath -q -x -l AppleUserAccount $host $rsyncPath $argList+
This is all I do to connect Apple computers, but configure other settings as needed, i.e., Email, Backup Settings, and Schedule
If something needs to be corrected or doesn't make sense, leave a comment.
As always, Enjoy!